Working with ISO images at Virtual Servers
Why you need own ISO image
You may need use own ISO image in two cases:
- when you need install own operational system (which is not provided by us or with special setting during install);
- when server fail from start and you need run rescue mode for diagnose/repair.
For working with ISO images we offer panel VMmanager. It is available for all our virtual servers.
Server management panel
To login to server management panel, in your customer portal click on left menu to Product/Services — Virtual private servers. Choose related server and in top menu click on "To panel". You will be automatically and transparently logged into server management panel.
Alternatively, you may login into server management panel using credentials which you got in server activation email. Also Instructions available in your customer portal on Product/Services — Virtual private servers page. Just choose related server and click on Instructions button in top menu.
Uploading of your own ISO image
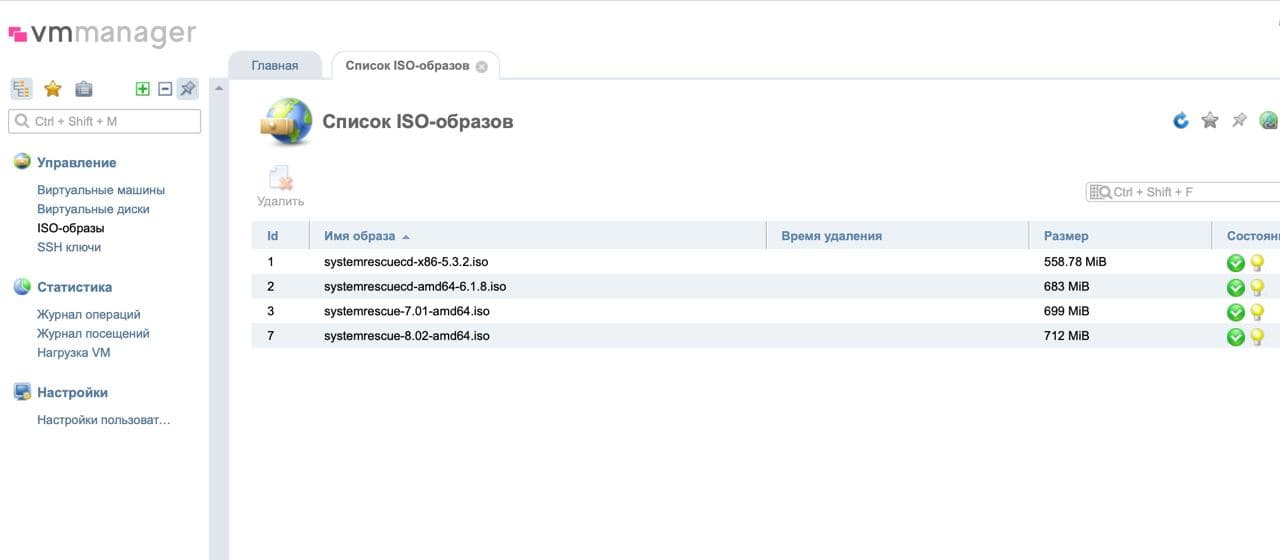
In server management panel in left menu please click on Management — ISO-images. In top panel click on «Upload» button.
Panel will offer you select related virtual servers to connect image and source for uploading: from local file or by link. Make sure that your link is available without cookie, login, passwords (let's say ready to simple download by wget utility).
Important:
- Size of uploading ISO-image should not exceed 2 GB. If you need upload image with more size please open support ticket;
- Uploaded ISO's stored for limited time — within 48 hours from uploading completion;
- You can store 3 images at same time.
Be careful with network setting for you own operation system. You will need set networking using provided data. You can obtain network setting for you server from information about your server IP's in server management panel on Virtual private servers page by choosing required server and clicking on IP-addresses button. You can also request this information from our support.
Start server from ISO-image
To start server from ISO-image:
- 1. login to server management panel and click on left menu Management — virtual private servers;
- 2. Choose related server and in top menu click on button «Stop»;
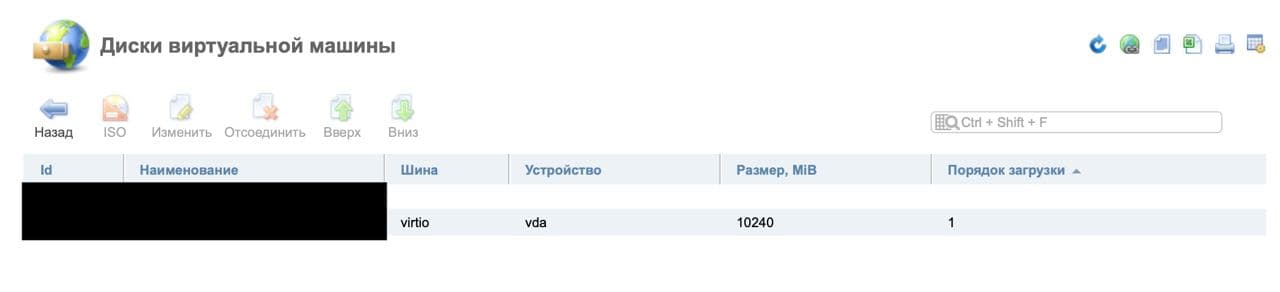
- 3. When server would be stopped, in top menu please click on button «Disks». In new modal windows click on button «ISO»
Choose your ISO image. Make sure that in field «Boot priority» value set as «In begin».
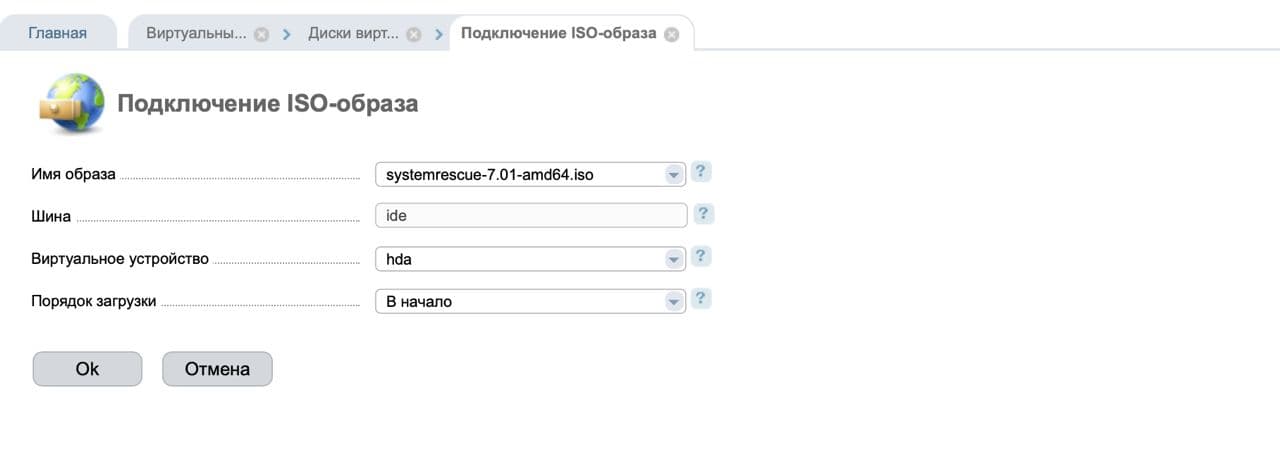
4. Click on «OK» button and return to Management — virtual private servers, choose related server and click on button «Start» that server begin start.
To watch or manage booting you need connect to VNC.
VNC connection
We offer two way to connect using VNC:
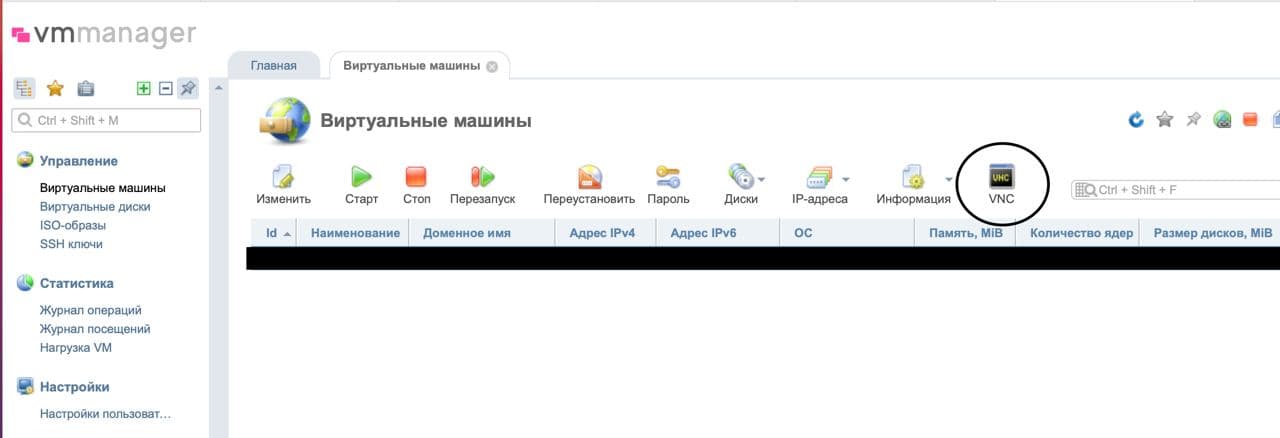
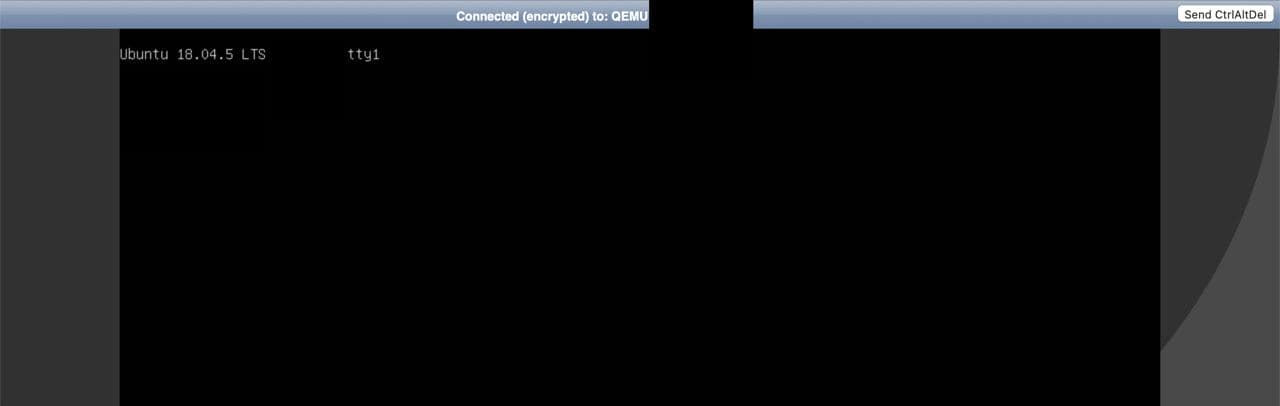
1. Using server management panel internal VNC client. To realize this go to Management — virtual private servers, choose related server and in top menu click on «VNC» button:
In new windows/tab of your browser you will see VNC-client NoVNC:
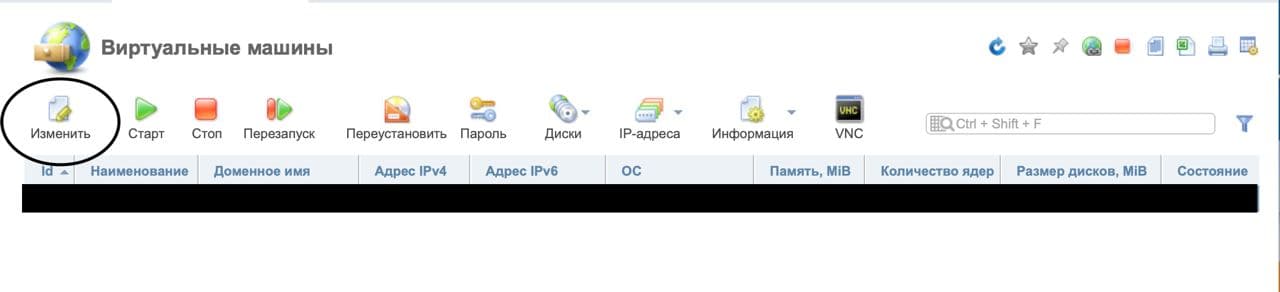
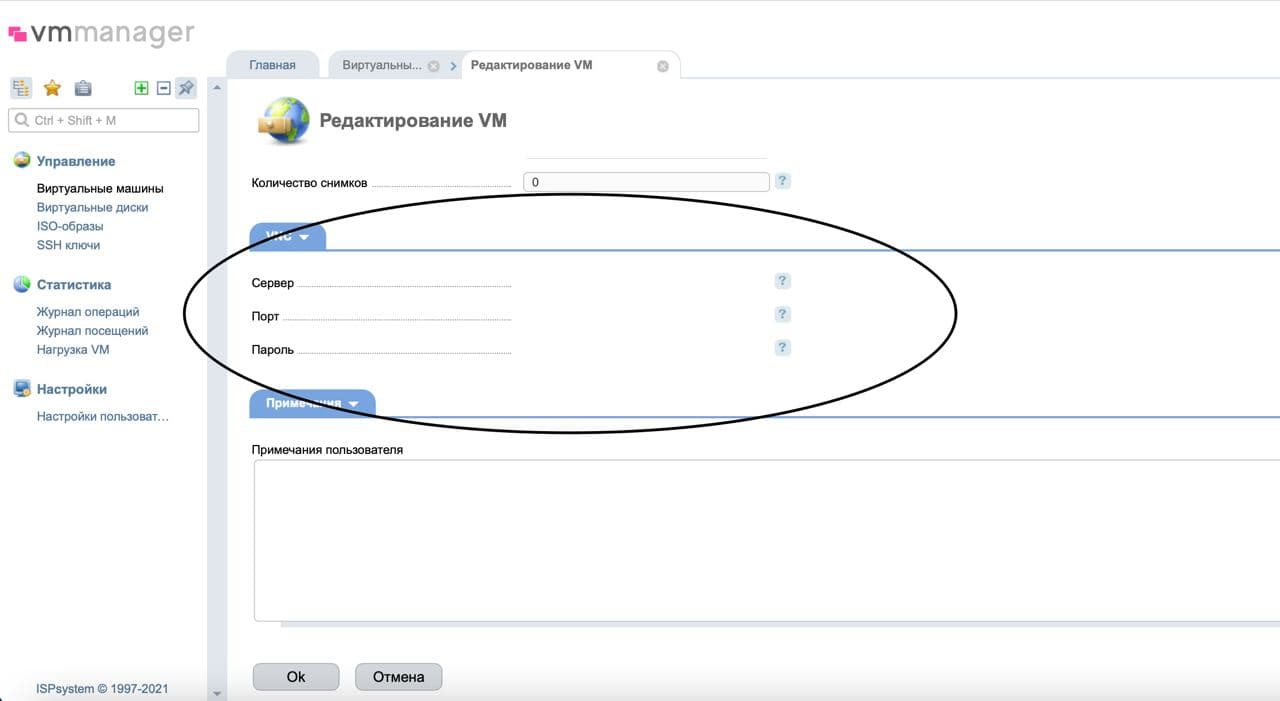
2. Using any VNC-client. For example VNCviewer. VNC Access credentials you can find in server management panel: at Virtual private servers page, choose related server and click in top menu on button «Edit»:
In new window/tab find «VNC» section. There you will see something like show below:
During reboot, when server management panel internal VNC-client disconnect, refresh window using F5 on your PC.
During boot process you can press button F12 on your PC and choose source from where your server need to be boot.


